

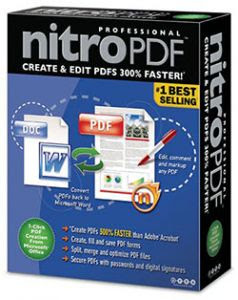
- Easy PDF Creation.
- Create and edit compilation PDFs.
- Convert to Word.
- Directly edit text and images.
- Stamps and watermarks.
- Intelligent stamps.
- Add enhancements and interactive features.
- Intuitive tools.
- Nothing gets lost.
- Organize feedback.
- Babylon is a powerful dictionary and translation software.
- To get translations and dictionary results with Babylon, simply use a preselected mouse button or mouse-keyboard combination to click on any text in any desktop application. The Babylon window opens and displays a translation or definition of the text you selected.
- Babylon includes a full text translator service that can handle sentences and passages up to about 50 words.Babylon includes a conversion utility that recognizes different types of numbers and units and converts these values into different currencies, units of measure or time zones.
- Babylon also provides audio pronunciations and phonetic symbols to help users hear and pronounce terms correctly.
- Babylon includes writing aids, such as cross-translation, conjugations and direct paste, to help users who are not fluent in English compose better texts in English.
Download :
http://rapidshare.com/files/77919754/BabylonPro.7.0.1.r4.FULL.rar
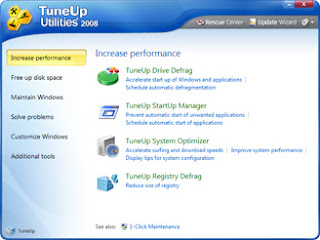
- Ctfmon is the Microsoft process that controls Alternative User Input and the Office Language bar. It's how you can control the computer via speech or a pen tablet, or using the onscreen keyboard inputs for asian languages.
Depending on your system configuration, there are a number of different steps to disable it. I've tried to list all the methods below.
Step 1: Disabling in Microsoft Office 2003
We can remove the alternative text input from Microsoft Office 2003 by just removing that feature in the setup.
Note: I haven't figured out where the equivalent setting is for Office 2007 (if there is one), but we can also disable it a different way below.
Go to Add/Remove programs, choose to Change your installation of Microsoft Office and make sure you check the box for "Choose advanced customization of applications" before you hit next.
 Find "Alternative User Input" in the list and change the dropdown to "Not available" so it looks like this:
Step 2a: Disabling in Windows XP
There's an additional step we can take to make sure it gets turned off in Windows XP, which really seems to be the best answer for XP users.
Open up Control Panel and choose Regional and Language Options.
 Choose the Languages tab and then click on Details in the top section.
 Now on the Advanced tab you can choose to "Turn off advanced text services", which should immediately close ctfmon.
 You'll also want to take a look at the first Settings tab, and make sure that your "Installed Services" box looks similar to this one:
 If you have more than one Installed service then ctfmon might come back… For instance on my system there was an input for my drawing tablet so I could use it as a text input… which I don't care about, so I clicked Remove on it.
Step 2b: Disabling in Windows Vista
The setting above for completely disabling text services doesn't seem to exist in Windows Vista as far as I can tell, but we can remove the additional input services using a similar method.
Open Control Panel, choose Regional and Language Options and then find "Change keyboards or other input methods".
 On the Keyboards and Languages tab, you can select Change keyboards.
 Now you'll finally be at the same screen as in Windows XP. You'll again want to remove the extra installed services in the list other than your default keyboard language.
Step 3: Remove From Startup
You won't want to perform this step before doing the others, because it will just be overwritten again. Open up msconfig.exe through the start menu run or search box, and then find the Startup tab.
 Find ctfmon in the list and disable it by unchecking the box. Just remember that if you haven't disabled ctfmon through one of the other settings this won't help you a lot.
Step 4: If all else fails
You can just completely unregister the dlls that run the alternative input services by running these two commands from the run box (one at a time)
Regsvr32.exe /u msimtf.dll
Regsvr32.exe /u msctf.dll
If you perform this step, you should also use Step 3 to get rid of the startup entries.
Step 5: Reboot
Reboot your computer and then open a Microsoft Office application if you do have that installed. Verify that ctfmon.exe is not running.
Close Registry Editor and either log off the system and log back in, or reboot the entire system if that’s your preference. If all went as planned you should see your new Start button with the revised text.
Note that you should not attempt this if you aren't ready to troubleshoot any problems that might occur.
The first issue we encounter is that computers with pre-installed operating systems take up the entire drive. Luckily Microsoft included the Shrink volume feature in Vista, so we can easily shrink the Vista partition down to make room for XP.
Open the Computer Management panel, which you can find under Administrative tools or by right-clicking the Computer item in the start menu and choosing Manage. Find the Disk Management item in the list and select that.

 Now you can choose the size that you want to shrink, which really means you are choosing the size that you want your XP partition to be. Whatever you do, don't just use the default. I chose roughly 10gb by entering 10000 into the amount.
The next step might be confusing, because we need to change the cd-rom drive that's invariably taking up D: at the moment, because we want to use D: for the Windows XP partition, but it's already taken by the cd-rom drive. If you skip this step than XP will install onto the E: drive, which isn't the end of the world, but it's not quite as tidy.
Right-click on the cd-rom drive in the list and choose Change Drive Letter and Paths from the menu.
 Now we'll change the CD drive to use E: by selecting that in the drop-down.
Now we can create a new partition for XP to live on and make sure that the drive letter is set the way we want. If you do not create a partition now the XP install will do so automatically, but it's easier and cleaner to do it this way.
Right-click on the Unallocated free space area and then select New Simple Volume from the menu.

Follow through the wizard and select whatever options you'd like, making sure to use D: as the drive letter.
Now you will need to close out of disk management and reboot your computer. This is because we can't do the next step until we reboot. (you can try, but it won't work)
So we've come back from rebooting… open up Computer from the start menu and then right-click on the D: drive and select properties.
Give your partition a meaningful name like "XP". It would be wise to name the C: drive to "Vista" at this point as well.

Now you'll want to pop your XP cd into the drive and boot off it. You may have to configure your BIOS to enable booting off the CD drive, or if your computer says something like "Hit Esc for boot menu" you might want to use that.
Once you come to the screen where you can choose the partition to install on, then choose either the unpartitioned space or the new partition you created. Whatever you do, don't try and install onto your Vista partition! See how much cleaner it is now that we've labeled each partition distinctly?
 We'll assume XP is completely installed at this point, and you will have lost your ability to boot into Windows Vista, so we'll need to use the VistaBootPro utility to restore the Vista boot loader.
Download and install VistaBootPro from vistabootpro.org
During the install you'll be forced to install the .NET 2.0 framework. Open up VistaBootPRO and then click on the System Bootloader tab. Check the "Windows Vista Bootloader" and then "All Drives" radio buttons, and then click on the Install Bootloader button.

At this point, the Windows Vista bootloader is installed and you'll only be able to boot into Vista, but we'll fix that. Instead of manually doing the work, we'll just click the Diagnostics menu item and then choose Run Diagnostics from the menu.

This will scan your computer and then automatically fill in the XP version.. click on the "Manage OS Entries" tab and then click in the textbox for Rename OS Entry, and name it something useful like "Windows XP" or "The Windows That Works"

Click the Apply Updates button and then reboot your computer… you should see your shiny new boot manager with both operating systems in the list!

If you get an error saying "unable to find ntldr" when trying to boot XP, you'll need to do the following:Find the hidden files ntldr and ntdetect.com in the root of your Vista drive and copy them to the root of your XP drive.
If you can't find the files there, you can find them in the \i386\ folder on your XP install cd
This is a critical piece of information: Windows XP will be installed on the D: drive, even in Windows XP… so you'll need to keep that in mind when tweaking your system.
 You can share information between the drives, but I wouldn't recommend messing with the other operating system's partition too much… it might get angry and bite you. Or screw up your files. What I do recommend is that you store most of your files on a third drive shared between the operating systems… you could call that partition "Data".
Enjoy...But,..Be a little careful..!
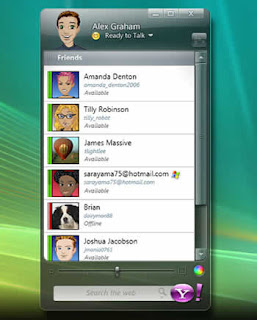
With just a small tweak, open infinite yahoo messenger accounts simultaneously..
Multiple Yahoo Messengers - video powered by Metacafe
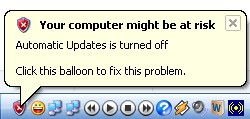
This can get quite annoying after a while. To turn off Security Center alerts :
1). Click Start and then click Control Panel.
2). Double-click Security Center.
3). In the Security Center, under Resources, click Change the way Security Center alerts me.
4). In the Alert Settings dialog box, clear the Firewall, Automatic Updates, or Virus Protection check boxes, and then click OK.
1). Open up notepad or a text editor.
2). Copy-Paste the following lines of code into a new file
[Shell]
Command=2
IconFile=explorer.exe,3
[Taskbar]
Command=ToggleDesktop
3). Then, save the file as showdesk.scf and move it to some place like windows folder.
4). Then, Create a Shortcut to the showdesk.scf file.
5). Finally, just drag and drop the shortcut into your Quick Launch panel or copy-paste it wherever you want it to be.
- DHTML: Introduction to scripting the DOM
- DHTML: Dynamic Client Side Table Sorting
- DHTML: Dynamic Class Switching
- Introduction to Regular Expressions
- Dynamic "Hide and Show" Content using the DOM
- Popup Windows: Doing Them Right
- A Simple DHTML Flyout Menu
- Formatting User Form Data
- More controlling form fields
- "Alertless" Client Side Error Messages
- The new and improved Date Picker!
- Spicing up Data Tables with Highlighting Rows
- An Abstract “Add Row” Class for Dynamic Table Rows (like Yahoo!)
- Introduction to AJAX
- The Ajax Filmstrip Ajax: Ready States, PHP and Arrays
- Google Maps and AJAX: Web 2.0 on Your Web Site

.jpg)
.jpg)
.jpg)
.jpg)
.jpg)
.jpg)


